Pilgrim Place Card
Adj and I were feeling nostalgic about Thanksgiving crafts from our youth this week. For me, this was the pilgrim hat place settings that my mom and I made when I was little. We've saved and used the same ones each year, and when there's a special guest or a new addition to the family we always need to make a few more.
Adj and I were feeling nostalgic about Thanksgiving crafts from our youth this week. For me, this was the pilgrim hat place settings that my mom and I made when I was little. We've saved and used the same ones each year, and when there's a special guest or a new addition to the family we always need to make a few more.

All you'll need is a scrap of black paper about 4.5" x 7" (construction paper or card stock will work), some scissors, a black marker, a glue stick, and a small scrap of white paper (I used an envelope from something I got in the mail this week). Fold your black paper in half hamburger-style and draw the outline of the pilgrim hat on one side. Cut along your outline through both layers. Cut a scrap of white paper to form the band of the hat and glue it on. Write your guest's name with the black marker and you're done!
Indian and Pilgrim Egg People
It had been along time since I had thought about family traditions but as Carole Ann and I talked about past times I was reminded of the many crafts that filled my childhood. The one that always occupied our thanksgiving holiday season was the creation of egg people. I first remember making these characters when I was about 7 and my mom at the time was my age now 25! As a single parent of three my mother never had a lot of money to purchase craft supplies but would teach us to craft things from whatever we could find around the house.

You Will Need
- 4 eggs (2 brown 2 white)
- 2 toilet paper rolls
- brown paper bag
- constriction paper
- Thumb tack
- scissors
- glue

Slowly begin to forcing air into the egg, through the hole in the top, this will force the egg insides out the bottom into your container. Be PATIENT this could take a while especially if the yolk has not broken. Don't forget to save the eggs for breki tomorrow morning. : )

Once the egg is hallow run some water from the tap through the egg and blow it out. This will prevent your egg people from stinking like rotten eggs. Set the eggs to dry upright on the paper towel. I leaned them against the counter wall this will ensure the water inside leaks out.

Now that your eggs are hallow you can begin to create the bodies. You start off with the toilet paper rolls these will serve as the body/ base for the eggs to sit in. Cut the rolls into 1 and 1/2" inch rings. You will need 5. There will be 4 for the bodies and one for the mans pilgrim hat.

Next you will cut out 4 pieces of paper 3" wide and about a half inch longer than the circumference of the toilet paper roll. I used a brown paper bag for the Indian bodies and black construction paper for the pilgrim bodies. Cover the toilet paper roll in glue and place in the center of the paper rolling untill it is completely covered.

Once the base has dried for a short while you will need to make cuts into the paper from the edge to the where the toilet paper roll and paper meet.

After the cuts have been completed line the inside of the flaps with glue and fold them inside the toilet paper roll.

While the 4 bodies are drying you can begin to create the accessories. You will need to cut 4 orange 1/4" strips of paper 2 for belts and two for head bands for the Indians. For the Pilgrims you will need to cut 2- 1/4" white strips for belts and 2 -1/2" x 1/2" and yellow squares for belt buckles. Glue the belts and to the centers of each base. Add the belt buckles for the pilgrims.

With your remaining two orange strips create two circles that will fit atop the eggs and serve as headbands. Next you will need to create the feathers. The ones pictured here are about 1 and 1/2" tall and 1/2" wide. After shaping them you can cut tiny slits in the edges to give it more of a feather look as I did here and glue them to the inside of the headband.

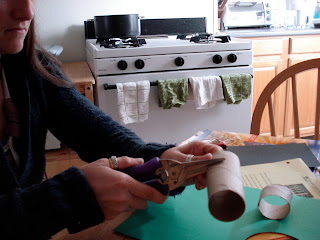
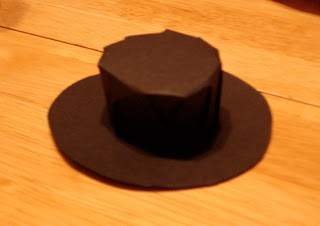
The pilgrim accessories will take a bit of time but are well worth the work. You will need to create the pilgrim hat next. Using a peanut butter jar trace a circle onto a cereal cereal box and a black piece of constructions paper. Cut them out and glue them together. The cereal box base will give the hat enough structure to hold the hat top.

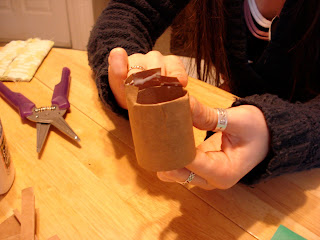
Using the 5th toilet paper ring place it in the center of a 4" square piece of black paper and make cuts about a half inch apart from the edge up to the ring.

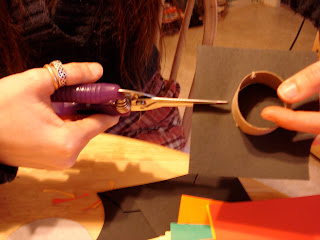
Placing glue on all the flaps fold each one around the sides of the ring and into the inside - one after another. While the hat top is drying cut a hole in the center of the hat base. This hole will allow you a way to secure the hat to the egg head. The pilgrim egg head will poke into this hole and will hide under the at top.

Once complete glue the hat top to the hat base covering the hole.

The final accessory you will need is the pilgrim bonnet. Using a white piece of paper about 3" wide and 4" long make a half inch fold in the right side of the paper. Next make 1 and 1/2 " cuts toward the center about an inch from the left side.

Fold the back flap around the side of the bonnet and glue it so that the edge is securely under the bonnet rim. Do this on both sides.

Assembly time! Take your dried eggs and glue them to the body base.


Next glue all the head wear accessories to the eggs.

Finally decorate with fine point sharpies as I did below to create faces hair and jewelry.

These little guys make great gifts. I am not a cook so any time that I have joined others for thanksgiving dinner I have brought a set of these along as my humble peace offering for not cooking a dish. They make great table centerpieces and if packaged safely can be reused year after year.
We hope that our thanksgiving nostalgia has inspired you to create something new or from you own past that you can share with others.
Good Luck and Peace
Adj and Carole Ann
We hope that our thanksgiving nostalgia has inspired you to create something new or from you own past that you can share with others.
Good Luck and Peace
Adj and Carole Ann


These are sooo precious and adorable, thanks for sharing! You inspired me to start a little blog of my own this weekend, joyinmystudio.blogspot.com :) Happy crafting!
ReplyDelete